Submitting Mediasite Video Assignments on D2L (Students)
Print
Modified on: Thu, 13 Nov, 2025 at 9:47 AM
Submitting Mediasite Video Assignments via D2L
- Log into D2L and navigate to the video assignment dropbox (Assessments>Assignments).
- In the Text Submission field, click on the Insert Stuff button.

- Select Add Mediasite Video to submit a presentation that you’ve already created.
- Use the video picker to select your video and click Link Video.
- Click Submit to submit the video assignment.

- Select Upload Video Assignment to Mediasite if creating a new video.
- Click Add New once the video picker loads and select the appropriate option. If using a Kutztown University computer, select In-browser.

- Mediasite Capture will launch in a new window. Follow the on-screen instructions to record your video.
- Select what video and audio sources to capture, then click the Record button to begin.
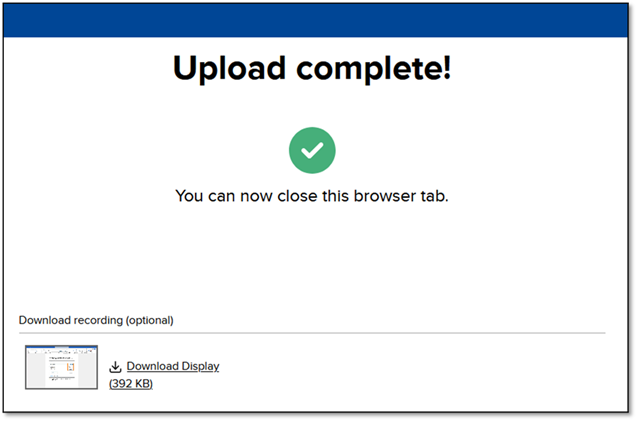
- Once the recording is finished, use the controls to trim, discard the draft, or upload it to Mediasite.

- Once uploaded, you can download a copy of your video or close the tab and return to D2L.
- When you return to D2L, your new video should appear at the top of the video picker. Click the Pencil icon to rename it and Link Video to submit it.

Submitting Mediasite Video Assignments by Link
- Log in to MyMediasite
- Navigate to a course shell in D2L and click on Resources>MyMediasite. Alternatively, navigate to https://kupmediasite.passhe.edu/Mediasite/MyMediaSite.
- Click Add Presentation
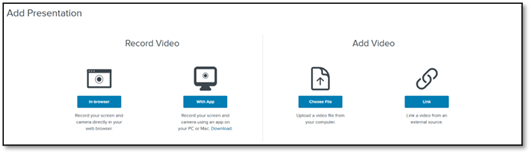
- You will be presented with the option to record a video or upload one.
- If you are on a University-owned asset, select In-browser to use the web tool. If you are on a personal device, you can use With App to use Mediasite’s recording software.
- If you have already recorded your video and have a video file, select Choose File.
- Record or upload your video.
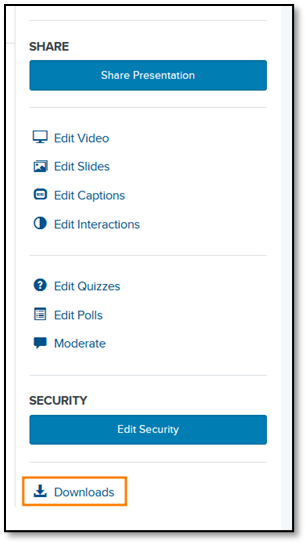
- Once your video has been uploaded, you will be taken to its settings page. Here, you can change its title and description, share, and download.

- To share your video, click Publish on the right sidebar.

- Click on the video’s title to go back and click the Share Presentation button to get a link.
- To download a transcript of the video, allow up to one hour to process, then click Downloads in the video settings page. Look for an email from Mediasite explaining that transcription for your video has finished processing.
Did you find it helpful?
Yes
No
Send feedback Sorry we couldn't be helpful. Help us improve this article with your feedback.