Accessible PDFs ensure that all users, regardless of ability, can engage with content. Inaccessible documents can exclude students, faculty, or staff who rely on assistive technologies like screen readers from accessing critical information such as course material or resources on campus.
Ideally, a document should be made accessible first within the original software to used create the document (such as Microsoft Word or Powerpoint), then any remaining issues can be corrected in Adobe Acrobat.
Using the Accessibility Checker
Adobe Acrobat has an accessibility checker that can be used to quickly check the accessibility of a document.
- Open your file in Adobe Acrobat and find the Tools sidebar. Select "Prepare for Accessibility" on the sidebar. If you do not see this option, you may need to select "View More" or manually add the Accessibility tool to the sidebar.

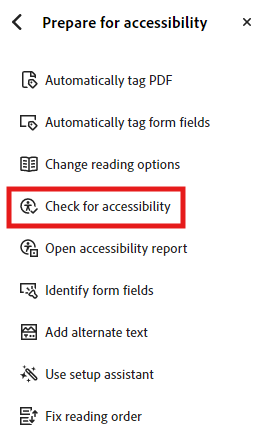
- In the "Prepare for accessibility" sidebar that appears, select "Check for accessibility."
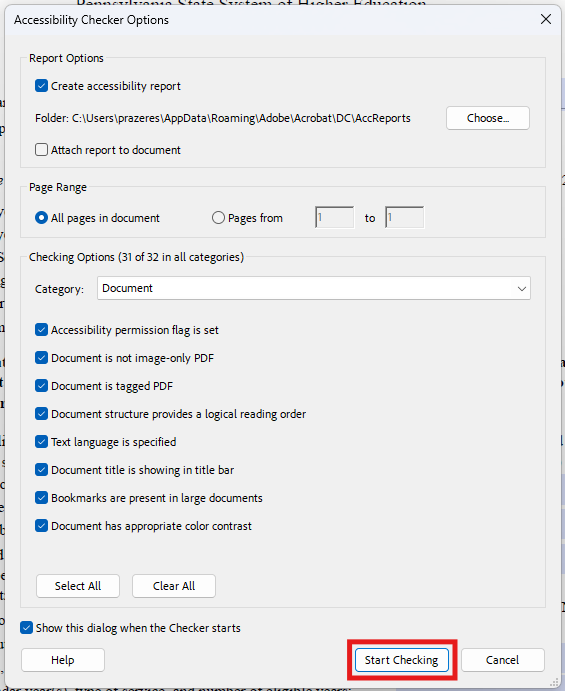
- In the "Accessibility Checker Options" pop-up, keep all options checked and select the "Start checking" button.
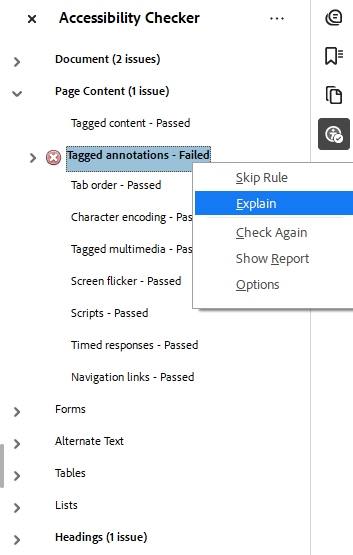
- The Accessibility Checker sidebar should appear with details on accessibility issues. Right-click on any issue and select "Explain" to be directed to a webpage with more detailed instructions on how to fix the issue.
- Acrobat's accessibility checker will only identify basic issues. Once all issues in Acrobat's accessibility checker are fixed, run your PDF through PAVE to find additional issues and ensure full compliance with WCAG 2.1 guidelines.